
Thursday, January 31, 2013
February 2013 Mr. Linky
Here is the Mister Linky for ALL of the links for the month of February...whether you are linking a picture of your kit, a mini challenge, or anything else you have created, link it here. There is a "quick link" to this Mister Linky on the top right side bar of the blog as well.
In order to make this Mister Linky a little easier to *understand* with so many different types of links in it...in the "name" field below, type your name and either the word "kit", "mini challenge", or "other" according to what you are linking. Hopefully that will keep it a little organized!!!
A Little Video Inspiration
I find videos very inspiring when I am creating. Each month on the 31st (if it has that many days) you can pop in here to view a favorite of mine from the month. Be sure to link us up with one that you like, too!
2 Peas has a TON of great videos! Here is one of their new series for 2013: 213 in 2013
And number 7 to e-mail us correct answers would be...Laurie Hansen! Congratulations, Laurie! I will pass your e-mail on to Paper Issues for your prize!!
2 Peas has a TON of great videos! Here is one of their new series for 2013: 213 in 2013
Enjoy!!
And for our winner of our Paper Issues contest...
Random Integer Generator
Here are your random numbers:7Timestamp: 2013-01-29 17:00:18 UTC
And number 7 to e-mail us correct answers would be...Laurie Hansen! Congratulations, Laurie! I will pass your e-mail on to Paper Issues for your prize!!
Tuesday, January 29, 2013
Been Caught Stealing: February 2012 Guest Designer
We want to welcome or second Guest Designer of 2013, Mandy!!! Her blog is FILLED with some beautiful altered art layouts!

"Hi, my name is Mandy (mandysea) and I live in Tasmania in a cottage by the sea and pretty much the sea is our way of life here. I’m inspired by my daughters and the love nature, birds and animals and use green and blue a lot in my scrapping so this February kit is perfect!
My scrapping style is probably Shabby Chic with an arty side using paints, gesso, mists, stitching and lacy bits along with layering and texture techniques. I love to feel these things in my hands and most of all – I love to see the shadow they can cast.
If I had some things that are undeniably me – it would be that I love to match some part of my photo to my background paper…. and sometimes extend the photo into the scrapping area, rarely use pattern paper (mostly because I don’t know what to do with it- yes I need help??), and usually draw a border around my papers edge or fold it to suggest a frame. These are not always, but mostly, and while scrapping, fall unconsciously into these habits ..… they just kind of evolve as I go along- you know what I mean? (big smile)
It’s not very often I start with a photo – that usually comes last. I know, I know – is that weird?? But the motivation from either the criteria, technique or the products pretty much takes over and with all the gazillion photos (rolling eyes here) I have stored away– something is bound to be just right LOL!
My blogs are http://www.teacupofscrapisms.blogspot.com and www.letsgetshabby.blogspot.com
WELCOME, Mandy!!!!
Friday, January 25, 2013
January Counterfeiter Blog Hop!

We are excited to bring back the hop! Huge thanks to Jemma and Lisa H. for heading this up for us everymonth. It would not exhist without you! (No pressure or anything...LOL)
This month's hop challenge: Use 3 pieces of patterned paper, 3 embellishments and 3 words!
Here is our hop list in case you get a bit turned around during the hop. Please make sure to leave a nice comment on each of our hoppers!
Ready...set...go!
Ready...set...go!
Wednesday, January 23, 2013
Pinterest: Inspire Me!!!!
Browsing through Pinterest, here are some of the latest pins on my scrapbooking boards...
 |
| Layers of banners |
 |
| Pinking scissors---old supplies are new again! |
 |
| Layers, electronic die cut machine title, stamps---use those supplies and tools! |
 |
| Use your supplies in new ways!!! |
Saturday, January 19, 2013
Challenge #3: Ombre Challenge
Ombre is a really fun trend right now that is being used for so many different mediums!

How about we give it a try?
Challenge #3: Ombre Challenge: Use this trend on a project in some way. It does not have to be the WHOLE project, just a part, if you like...
And from our fabulous Design Team...


Thursday, January 17, 2013
Trash to Treasure: New Feature
This is not our logo but it sums up this new feature we thought of for the blog. We would really like to know your thoughts on our new features, do you find them helpful? Useless? Intriguing? Something else? Drop us a comment and let us know what you are thinking!
Today I am here to share how to take something from well trash to treasure LOL! Today we are going to be looking at packing material. Yes packing material. There is so much you can do with these "trash" or recyclables before they go into said bins.
So who does NOT like to pop bubble wrap? In my household it is a cheap entertainment tool! BUT did you know that you can also use it to make backgrounds for your cards/layouts etc? Spread some ink, paint, etc onto a surface, ball up the bubble wrap and "stamp" your little heart out. Easy and unique background! Here is just ONE example, you can make it as precise or as messy as you want (and they even make stamps with this pattern! Look at that saving you money already!)
 | ||||||||
| http://fancythatnotion.blogspot.fr/2012/05/bubble-wrap.html |
Here is another quick idea. Cardboard, yes that stuff from shipping boxes etc. It can be useful for many things, to stamp on, get messy and even to punch/die cut shapes from. However my favorite usage is using the 'guts' of it to make a corrugated base on the cheap (note it is NOT acid free). You can tear it to look like:

Or leave it plain, paint it, mist it, punch it, die cut it, etc etc. The sky is the limit!
Now what have you used around the house that is not meant for scrapping? What would you like to see explored here?
Wednesday, January 16, 2013
Contest Alert!

Shhh...don't tell Meridy and Crystal I'm here. I know this is not a regularly scheduled posting day, but I have a little bit of a contest I want to throw at you! Ready?
Head on over to Paper Issues and pay attention to the following things:
1. How many feet of twine are in the Fourteen Valentine's Day Tag Embellishment Kit?
2. How much does the adorable woodgrain washi tape cost?
3. How many slices of pie are in the stamp set Back to School?
4. What is the sentiment in the kit: I need more Gold Dot Washi Tags, Banners, Buttons and Trim?
5. Where is the owner, Cassie, from?
E-mail me the answers at counterfeitkitchallenge@yahoo.com by January 28th. What can you win, do I hear you say? How about this:

(I am planning on announcing the randomly selected winner on the 31st...so get to hunting!) **International players welcomed!
Tuesday, January 15, 2013
Sketch Inspiration
Oh, how I love sketches---maybe not all of the time, but they are so good for many things. I use them to get me out of a creative rut, I use them when I want to start and finish a layout in one sitting, I use them when I just don't want to think about every.single.step of creating a layout. But most of all I like them because they are versatile. You can take them and use them EXACTLY how they are, or you can change them just a little tiny bit, or use them as inspiration and make your final layout barely resemble the original sketch.
This year I have decided that I want to get LOTS of layouts done. So my plan is to create a layout (either free form, or from a sketch) and use that layout as an exact blueprint (or sketch) for a second layout. I feel like the second layout comes together so quickly, so I really feel like I'm being productive! So basically, I'm using every layout I create as a sketch for the next layout. I'm limiting myself to 2 identical layouts at a time, because I don't want to get bored.
Here are a few sketches to inspire you this month from PageMaps.com.
 |
| January 2013 Double Page Sketch from PageMaps |
 |
| January 2013 Single Page Sketch from Page Maps |
 |
| December 2012 Card Sketch from Page Maps |
Sunday, January 13, 2013
Step By Step
I am SO excited about this new monthly feature! Sometimes when I see a finished project, I wonder how on earth they got there...and the changes they may have made along the way. Now you will get a little peek into my process every month as I share with you something I make with my kit.
I am an extremely visual scrapper. I rarely just start on a project without doing some internet browsing first. (I have alot of interruptions and need the time to focus a bit before I start...and it gives me something to refere back to with all of the stopping and starting I do.)
I was browsing the videos on 2 Peas and spied this cute card that happens to fit nicely with our first challenge!
You can head HERE to take a look at it and even see Julie's process.
Step one: Pick our your supplies. I based mine on our challenge of 3 Patterned Papers, 3 Embellishments and 3 Words. (This is also the first challenge of the year for my friend Pam and I (Hi, Pam!). We like to do long distance card challenges and Pam got me a little more organized with it this year with a GREAT challenge organizer!)

Step 2: Round the top Corner. (My symmetrical self surprisingly loves just doing one corner.)

Step 3: I noticed that Julie's card had a white base with kraft on top. I decided to use some white chalk ink to ink the edges of my Kraft base instead.

Step 4: Get interrupted by family to make breakfast...go sledding...see a movie...get frozen yogurt...play a game...HEY! It is my turn now, people! Entertain yourselves for a while!
Step 5: Shut yourself back in your craft room and cut out the 3 patterned papers to use on your card base. I love the read chevron and decided to make that the focus. The teal works really well with it and grey seemed like more of a neutral accent.

Step 6: Look through EVERY STAMP YOU OWN to find one that will work for 3 words. Yeah. Thanks alot for that, Crystal. Way to make it hard for me! I finally settled on the SMILE stamp...nice, cheery, to the point. I decided to mimic the colors I used for the paper in my ink choices.

Step 7: Use some of that super cute twine to add an accent to the equally cute corduroy button (Thanks for that, too, Pam!). Also, cut a small slit in the side of your card so you can wrap twine around the front.

Step 8: After gluing down the sentiment (yes, I did it cattywampus on purpose), then start winding the twine through the slit and around the card front.

Step 9: Hmmm...that button...Love it, but need it to help be a bit of a cluster with my stickpin. Stickpins are tricky to add sometimes. They are pointy and sharp and I would hate for my card recipient to get poked. I think using a foam square with the button with give the stick pin a nice place to go.

Step 10: Stick the stick pin through the foam square AND underneath the patterned paper. For safety reasons. LOL

Step 11: Wish you could add more stuff to it, but know that you are following the rules. LOL

Friday, January 11, 2013
Tutorials: Flair

Those little "flair" buttons are just so popular they seem to be popping up everywhere...even in this month's inspiration kit! To recreate "flair" from this month's Inspiration Kit, check out the following 3 tutorials by our own Master Forgers...
Lynnette's Flair Tutorial
Milissa's Flair Tutorial
And one more link, just for good measure...
Brigit's Flair Tutorial
Thanks for looking, let's see what "flair" you can design!
Wednesday, January 9, 2013
Challenge #2: Cookie Cutter Challenge
So how many cookies and treats have YOU consumed this holiday season? I intentionally did not bake much, but my dear friends loaded me up anyway with their own delicious creations. Foiled again!

I have discovered the secret to making sugar cookie cutouts with kids...
Gordon's Food Service pre-cut out and frozen sugar cookies! They are delicious! And all you have to do is take out as many as you like and bake them. They even have tubs of frosting ready to go! Genius! My kids love the decorating part and I don't get frustrated with the lack of actual shaped cookies we are able to make. It is a win, win!
The downside of all of my brilliant cookie baking short cuts is that I have no need to get out my lovely collection of cookie cutters...until now!
Challenge #2: Use a cookie cutter either ON your project or to make something for your project!
Here are some great ideas to get you started:
Melting beads in a cookie cutter
Cookie Cutter Garland
and here is some inspiration from our Design Team. Sigh. I love these ladies!


Monday, January 7, 2013
Wood Embellishments Tutorials
Wooden Embellishments are still all the trend going into 2013. Many companies are producing these cute embellishments, but finding them can be tricky for some of us.
Here are some that I LOVE!


Here are some that I LOVE!

To recreate the cute Wooden Branch found in our inspiration kit this month, here are some ideas for you!
Amanda Jones: DYI Wooden Embellishments
Master Forger Jennifer!
Master Forger Rebecca!
Another from Master Forger Rebecca!
Master Forger Jennifer!
Master Forger Rebecca!
Another from Master Forger Rebecca!
You can also:
1. Use Chipboard and stamp wood grain on it or cover it with woodgrain paper
2. Layer a die cut to get some thickness and use woodgrain paper/stamp for the top layer
3. fine some cute wooden shapes at a craft store
4. Stamp on a posicle stick for some great word alternatives
5. Buy some thin veneer sheets and use a punch or die cut machine to make shapes
Here are some great links for altering your wood embellishments:
And some Freebies:
Saturday, January 5, 2013
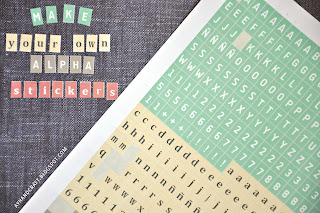
Tutorial-Printable stickers/tags etc
Good morning! How are you all today? Today I am here to share the first tutorial of 2013! Now with the holidays just happening funds are probably pretty tight, right? Well then you will love this one! The internet is FULL of free printable items to use in your scrapbooking. Just print, trim, and paste VOILA instant FREE embellishments. And who does not like FREE, right? Here are a few to get you started! Please click on the link to go to the site and download!


Now the next one I have to share with you is how to make your own tiny type letter stickers using the computer and a printer! I don't know about you guys but I LOVE these little stinkers! Enjoy!
Thursday, January 3, 2013
First challenge of the year, are you ready?
Welcome back forgers! Did you get your kits made up? Did you post on Mr. Linky? If not please do so! We love seeing what our readers are doing AND this month every time you link up you get a chance to win the 20.00 gift certificate from Paper Issues!
Now onto today's challenge, the first of the year. Are you ready? Here it is:
Create a project using the following ONLY (not including cardstock/pictures/adhesive)
**If you have any more questions, please see the BLOG HOP tab at the top of the page.
Now onto today's challenge, the first of the year. Are you ready? Here it is:
Create a project using the following ONLY (not including cardstock/pictures/adhesive)
THREE patterned papers
THREE embellishments
and only use a THREE word title!
Think you can do it? I hope so! Post when you are done! See you back on the fifth for the first tutorial of the month!
This challenge is going to be for our end of the month participant BLOG HOP on the 25th!
To be a part of our blog hop:
1. E-mail us your name/blog address/promise to participate at counterfeitkitchallenge@yahoo.com BY THE 15th! (No late requests will be able to join this time due to the work it takes for us to get it put together.)
2. You will receive an e-mail from us by the 20th with a list of the hop participants.
3. You will need to schedule your own blog post showing your project based on this challenge and links to the person after you in the hop.
4. All Blog Hop posts will need to be scheduled to go live on the 25th at 12:00 A.M. Mountain Standard Time.
**If you have any more questions, please see the BLOG HOP tab at the top of the page.


Tuesday, January 1, 2013
January Kit, Blog Hop and MORE!
Happy New Year!!!! I cannot believe it is 2013 already! WOW! I hope you have a very creative and fun year. Today we are starting off with a bang as they say. In 2013 we have a bit of a different format for the blog in mind so we hope you enjoy it. Please let us know as the month goes on what you do and do not like, we are always open for suggestions to improve and give our wonderful readers what they want!
Now onto why you are here! Our inspiration kit this month. This month we had a wonderful lady Cassie B, make this kit with us in mind. Cassie owns an awesome scrappy store on Etsy called Paper Issues. She carries LOTS of items and has agreed to not only do the kit for us, but also be our sponsor this month! I have personally ordered from her and the package came FAST, accurate and so cutely wrapped it made me smile! YAY! Keep reading for that information.
She put together this awesome kit called A Merry Winter:


I will be back on the 3rd with our first CHALLENGE of the year!! See you then! ~Crystal
Now onto why you are here! Our inspiration kit this month. This month we had a wonderful lady Cassie B, make this kit with us in mind. Cassie owns an awesome scrappy store on Etsy called Paper Issues. She carries LOTS of items and has agreed to not only do the kit for us, but also be our sponsor this month! I have personally ordered from her and the package came FAST, accurate and so cutely wrapped it made me smile! YAY! Keep reading for that information.
She put together this awesome kit called A Merry Winter:
Here are the contents:
Full pack of Glossy Red Thickers
A Full Sheet of Sleigh Ride Accent Stickers from Crate Paper
A Full bottle of Heidi Swapp Tinsel Color Shine
A set of 4 metal buttons from Bluebird Chic (Leah's awesome company)
3 random Mistable chipboard stars from Pink Paislee
1 cream rosette from Maya Road
1 red rosette from Maya Road
2 trinket pins from Maya Road
3 silver, 3 white dots
3 kraft banner pieces
4 buttons from American Crafts
1 Wooden branch from Maya Road
1 yard of sequin trim
1 yard of Aqua Hug Snug seam binding
1 yard of Maraschino twine from The Twinery
Papers:
2 sheets of white textured cardstock from American Crafts
1 sheet of Jingle Bells from Crate Paper-Sleigh Ride
1 Sheet of Silver Bells from Crate Paper-Sleigh Ride
1 Sheet of Winter Wonderland from Crate Paper-Sleigh Ride
1 Sheet of O Christmas Tree from Crate Paper-Sleigh Ride
1 Sheet of Rudolph from Crate Paper-Sleigh Ride
1 Sheet of Let It Snow from Crate Paper-Sleigh Ride
1 Sheet of White Christmas from Crate Paper-Sleigh Ride
1 Sheet of Deck the Halls from Crate Paper-Sleigh Ride
1 Sheet of Tag Cuts from Crate Paper-Sleigh Ride
1 Sheet of Annual from Studio Calico Classics 3
1 Sheet of Timesheet from Studio Calico Classics 3
Now I KNOW our wonderful DT full of new and old(er) members slammed this one out of the park so let's get to the blog hop!
Milissa
http://millermall.blogspot.
Rebecca
http://howiburb.blogspot.com/
Now before you go hopping off let me share one more AWESOME piece of news! Cassie from Paper Issues is doing TWO very awesome and generous things for our readers. First she is offering 20% off EVERYTHING in her store using the code COUNTERFEIT!!! As if that is not enough she is also going to be giving away a 20.00 Gift Certificate to her store to one random winner that we will draw at the end of the month from all those who enter on Mr. Linky!
Now, how can YOU participate? Go to the sidebar and use Mr. Linky to link us to YOUR kit or project using your kit so we can leave you some love! We will make a brand new Mr. Linky for each month, so get your blog posts linked ASAP!
To make Mr. Linky a little easier for us to use, please type your name and then a description of what you are linking (ie: kit, mini challene, ect...).
Subscribe to:
Posts (Atom)